Adding Art to ARTsala
The core of ARTsala is your artwork. Within ARTsala you will organize and share your art with collectors, galleries, and the world. By following the instructions below, you may easily add art to your account.
- You may add art to ARTsala by clicking on the "Add Art" quick link on the left hand side of your screen (it will appear on every page as long as you are logged in), or by clicking on the "Add Art" button on your art management page.
-
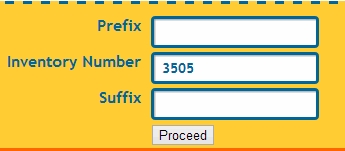
The first screen you will see is your inventory number input. Inventory numbers help you easily and quickly identify and track your artwork. If you already have a numbering system you may incorporate it into ARTsala. Just change the inventory number to match your numbers. ARTsala automatically suggests the next highest available number as the default, but you can change the number as needed.
The only limitations for your inventory number are that the number needs to be a whole number - no decimals or fractions - and that you can't repeat numbers.
You can also input a prefix and suffix for your inventory number. Some artists like to add code to their numbers to give them more information about a piece; medium or date information, for example. These fields are optional, and only the numeric inventory number is used by ARTsala to search and index your art.
Click the "Proceed" button to continue.
-
Now, you can enter all of the pertinent data about your work of art. While most of the fields are self-explanatory, please note that "Category" is a required field. This field will be used to categorize your work if you share it on gallery sites. This field is different than medium or subject matter, and has no direct impact on your website.
Because of the way art is organized on gallery sites, it is not possible for you to add additional categories yourself. Please select the category that best describes your work, or choose "Other". If you would like to request an additional category, please contact our support team. If we receive enough requests for the new category, we will add it.
- You can also enter a creation date for the work of art. We suggest you use the date the work itself was created rather than the date you are entering the work into ARTsala. There is a drop-down calendar to select dates, or you can enter the date manually in the format yyyy-mm-dd (e.g. 2026-05-26)
-
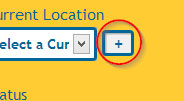
Next, set the current location of the artwork. If the location you desire isn't available, click the "+" button next to the location field to add the location. All of the information you've entered will be saved while you add the venue or gallery.
You may also add new Media or Subjects by clicking on the "+" buttons next to those fields.
- Fill in the rest of the information as needed and select an image to upload by clicking on the "Choose File" button in the upper right corner of the screen. If you have questions about uploading images or image format, please see our uploading guidelines.
Finally, you can decide whether you would like the artwork to appear on your ARTsala website (if you've signed up for the Inventory Management+Website option).

That's it - you've added art! Don't worry if you made a mistake during the process - you can edit or delete art on the art management page.